Tuesday, March 26, 2013
Knowing The History Of Photography
While we moved away from film and moved into the digital age, it is just appropriate for us to find out where modern photography came from. Do you know that lighting and other photography techniques started in the 1820’s? Daguerre and Niepce were actually the first inventors of modern photography and they made use of a chemical component from chalk and silver that darkens when exposed to light. This kind of technology used a glass negative to cement the picture.
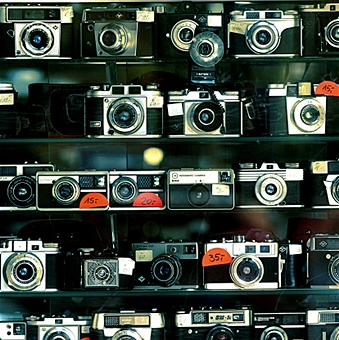
 Next to this were the manual cameras with film. The negative or film captured the image on a roll and were developed in a dark room to avoid over exposure. With manual cameras, you had to understand aperture, white balance, shutter speed, and metering to get the best picture possible.
Aperture is determined by F-stops or the amount of light the lens will let in. Focusing and depth of field are also important in setting the aperture of your camera. To avoid over exposure and blurriness, you need to know what numbers allow more light to enter the lens and the converse. On the other hand, shutter speed is the amount of time a lens is open for the photo. Notice that in a dark room your camera without flash takes a while to imprint the image on a negative. This happens when the light is dim and the shutter needs to adjust. The lack of light causes a need to expose the film longer to obtain the photos while more light makes the shutter move at a faster speed.
Now, from the manual cameras we move on to automatic. This camera is lighter and at the same time its aperture and shutter speed is already programmed in the settings. You just need to choose the right settings and hold the button down to focus. However, a number of automatic cameras still have manual options being used by people who treat photography as an artistic profession.
Digital camera is the new age in photography. It allows us to view the picture we take without the use of film and negatives. It also allows us to send the pictures to our friends and to print them using our home printers. In this age, everyone can take pictures and not just a few who are skilled in taking the perfect shot.
In spite of this development, the need for professional photographers remains in demand. Light sensitivity remains important with digital cameras. One really has to learn the techniques in taking pictures when using available light, be it natural or artificial. Hence, it is important that we know past photography techniques for us to obtain quality photographs using our digital cameras.
Wednesday, March 20, 2013
Still Life Photography: Back To The Basics
Staring at the new resin floor we had installed recently, I decided to take photos of it. Still-life photography is one of the first lessons in any photography class and can be more difficult than you could imagine. It is easier as compared to landscape, children and pet photography but it is actually a challenge to make still-life objects interesting with your camera.
Yes, you can actually be the photographer you’ve always wanted to be and I’m going to help you become that photographer. This could be the start of one of the most exciting, fun and rewarding things you’ll ever do. However, you would need a good balance between subject matter, angles, and lighting to have a good still-life photo. Below are the things you should keep in mind to be able to accomplish that.
 1. Find inspiration from professional still-life images. Choose the ones that catch your eye and appeal to you somehow. Pay attention to subject matter, shadow and angles that the photographer used. This could help inspire your own photography.
2. Choose your subject or the objects you’re going to shoot. Keep the picture simple and with less objects, possibly three. Gather a variety of objects to practice taking pictures such as fruits, vegetables, flowers, books and figurines. The types of subjects you choose will vary and depend on the style you are aiming for.
3. Arrange the subjects you’re going to shoot. You may place a smaller object leaning against a larger object. If your photo subjects are books, you may stack them on top of each other. Try different angles from which to photograph.
4. Choose a nice setting for your still-life photography. If you want to use a light box to create a soft, natural look, then you should use at least two lamps; one for the strongest amount of light and the other for filler. For natural light, you may place your subjects near an open window. Remember to pay attention to shadows from the outside or from the sun. You should also opt for backgrounds that are solid or plain colored, which will not detract from your still subject.
5. Practice taking pictures with different lenses, in different lighting, with a variety of shadows, backgrounds and angles. If you’re using natural light, take photos during various times of the day until you’re satisfied with the effect.
Besides, still life photography is an extremely rewarding business since magazines, websites, and catalogues all require product shots. There are many benefits to photography which are often underestimated. Hopefully with the basics I shared with you, you’ll be creative and start taking some shots yourself!